Appreciating AppKit, Part 1
posted on
WWDC 2019 is approaching and we are getting ever closer to finding out what form Apple's Marzipan project (which aims to enable developers to more easily port iOS apps to the Mac) will take when it is released to developers. Based on the scarce details we have, Marzipan seems to allow developers to build Mac apps using UIKit, with some additional features to make those apps feel like proper Mac apps.
I highly recommend reading both of the linked articles. They were written by Steve Troughton-Smith, who has investigated Apple's initial Marzipan apps and frameworks that were shipped with macOS Mojave, and has created a tool to let you try marzipanifying your app today
The announcement of Marzipan has had quite a varied reaction. On the one hand many iOS developers are excited at the prospect of being able to port their apps to a new platform without needing to learn another UI framework. On the other, many Mac developers (including myself) are somewhat wary of what the future holds. The reason for both of these views is quite simple: AppKit.
AppKit
AppKit is Apple's UI framework for building apps for the Mac. It has existed in one form or another for around 30 years and is the basis for many of the concepts and features of UIKit on iOS. Understandably, given its age, it has quite a few quirks and dated features. Some can simply be ignored, such as drawers. Others are still core to how parts of AppKit function, such as NSCell. These features can make AppKit seem daunting and difficult to work with, especially for those who have only known UIKit.
However, the upside of AppKit's age is that it has an incredibly rich feature set. If you get over the initial hurdle you find a framework far more powerful than UIKit has ever been. Indeed it is this power that has played a significant role in allowing small teams to build the sorts of apps the Mac has been celebrated for.
I often feel that AppKit is under-appreciated by those who don't have a lot of experience with it, and especially with switching back and forth between Mac and iOS development. To help try and fix that, I am going to go through some of the features in AppKit that don't exist in UIKit. In this post I'll cover the many controls of AppKit, and in a future post I'll go into some of the less user-facing features.
This will by no means be a comprehensive list, but will hopefully show you some of the key differences, some of the cool but rarely used features, and some of the things Apple will need to look at adding to UIKit to aid building truly great Mac apps.
Controls and UI
To start with, let's look at the most visible parts of AppKit: the views and controls that make up your UI. I will be using examples available in Apple's applications where possible, so you are able to try the controls out yourself.
Buttons
Basic buttons are much the same in AppKit as they are in UIKit (though they come in a wider range of visual styles).
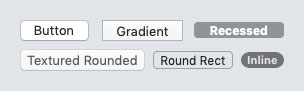
There are also several more styles which change the behaviour of the button such as checkboxes, radio buttons, disclosure buttons, and a standard "Help" button.

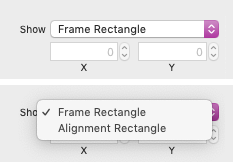
There is also the subclass NSPopUpButton which offers a menu of items to select from. It can be configured as either a "Pop Up" button (for selecting a value from a list, which then appears as the value of the button) or a "Pull Down" button (for selecting an action from a list).

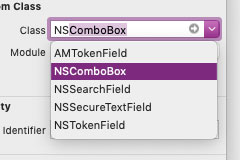
Text Input
Much like with buttons, the basic text field is very similar on both platforms. However, AppKit provides some additional subclasses, the main 3 being NSSearchField, NSTokenField, and NSComboBox.

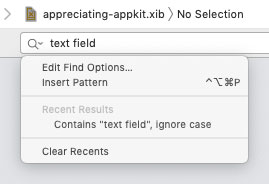
NSSearchField re-styles the text field with rounded corners and a search icon. It includes functionality for displaying a menu which can contain functionality as search options and recent searches. The Mac also shares search field content across the system, so entering a search term in one field makes it available in every other search field on the system.
NSTokenField adds support for tokenising text input, which is useful for things such as tag fields, or for "sender" fields in messaging apps. As well as basic tokenisation you can provide auto completion to users via the delegate. For me this is one of the most puzzling omissions from UIKit as it is non trivial to implement, yet many apps (including Apple apps like Mail and Messages) have need for this functionality.
Finally, NSComboBox is similar to NSPopUpButton, but it allows for custom user input rather than just a fixed list.
Sliders
AppKit adds additional functionality to sliders. To begin with, sliders can be displayed horizontally, vertically, or as a rotating circular slider.
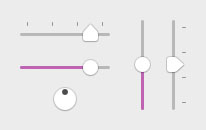
They can also be configured with tick marks. These tick marks act as "sticky" points on which the slider knob stays for a bit as you drag. Sliders can also be configured so that you can only stop on tick marks and nowhere in between.

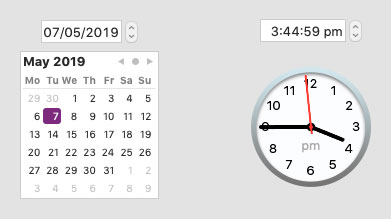
Date Picker
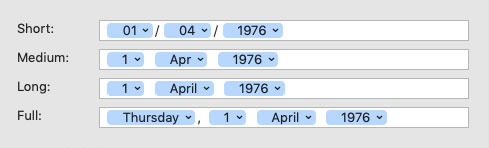
On iOS, a UIDatePicker works just like any other UIPicker, allowing users to slide up and down to select a date. AppKit's NSDatePicker usually takes the form of a text field that lets the user type in a value using the keyboard (or step through options with the up/down arrows keys). This highlights one of the key advantages of a mouse based UI, as it allows for a much more compact control on the Mac vs iOS.

However, where NSDatePicker really shines is with its graphical mode. This presents a full calendar view for dates, along with a clock times. Even more powerfully, you can configure it to allow the selection of date ranges.
Tables, Outlines
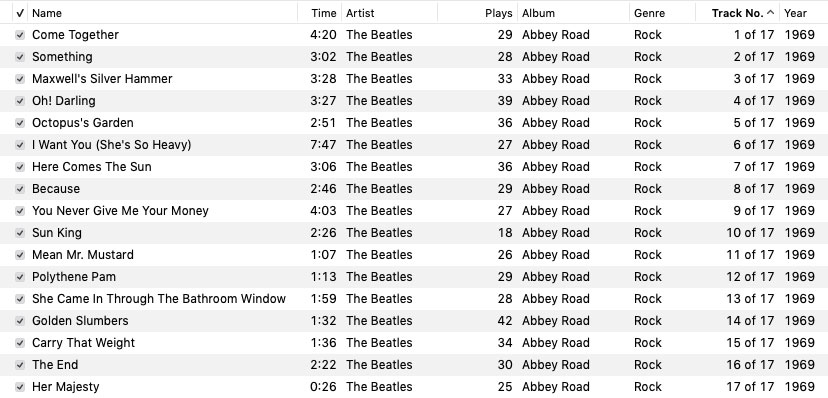
UITableView is the foundation of a huge number of iOS apps. It has been used for both basic lists and as the basis for complex "details" views. Give how vital it is to many iOS apps, it may sound surprising that it is somewhat underpowered in many regards compared to its older AppKit counterpart: NSTableView.
By far the biggest difference between the two classes is NSTableView's support for multiple columns. The user can click a column header to sort the table, drag them to re-arrange the columns, and even right click to show and hide the columns they want to see. This is best exemplified in iTunes.
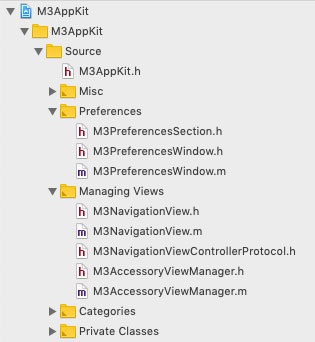
Next is NSOutlineView, arguably the most significant omission from UIKit. Put simply, NSOutlineView is a table view that supports nested cells, which can be hidden and shown. Now, you can create an outline view on iOS using a UITableView, but it requires a lot of additional logic to handle expanding and collapsing rows, and converting a tree-formatted data structure into the flat list UITableView expects. NSOutlineView handles the complexities of expanding and collapsing rows for you (including expanding or collapsing all children when a user option-clicks on a disclosure triangle), and its item-based data source makes handling tree-formatted data structures a breeze.
Rule Editor
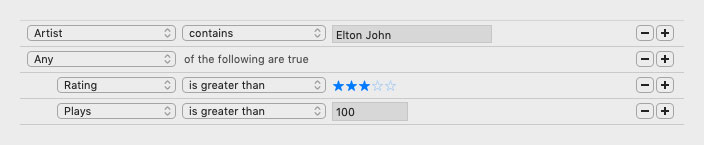
One of the best examples of AppKit's versatility are NSRuleEditor and its subclass NSPredicateEditor. You may have encountered NSRuleEditor when editing rules in Mail.app, and NSPredicateEditor is used for Smart Folders and Smart Playlists in Finder and iTunes. These allow users to visually construct filters that you can then get as an NSPredicate to filter your data.
Split Views
If you have developed an iPad app, you will likely be familiar with split views in UIKit. These allow you to show two view controllers side by side, usually some form of list next to some sort of details view.
Split views in AppKit are a lot more flexible and powerful. They can arrange as many views as you like either horizontally or vertically. And unlike their UIKit counterparts, they allow users to resize the width/height of each view. This functionality is often seen as a key part of what makes a Mac app feel like a Mac app.
NSGridView
NSGridView is a relatively recent addition to AppKit, first appearing in macOS 10.12. As the name suggests, it lays out its contents in a grid. Much like NS/UIStackView it is powered by Auto Layout and is designed to help remove the number of constraints you need to manage yourself. This makes it ideal for things like settings screens, which often show a grid-like UI.
Toolbars
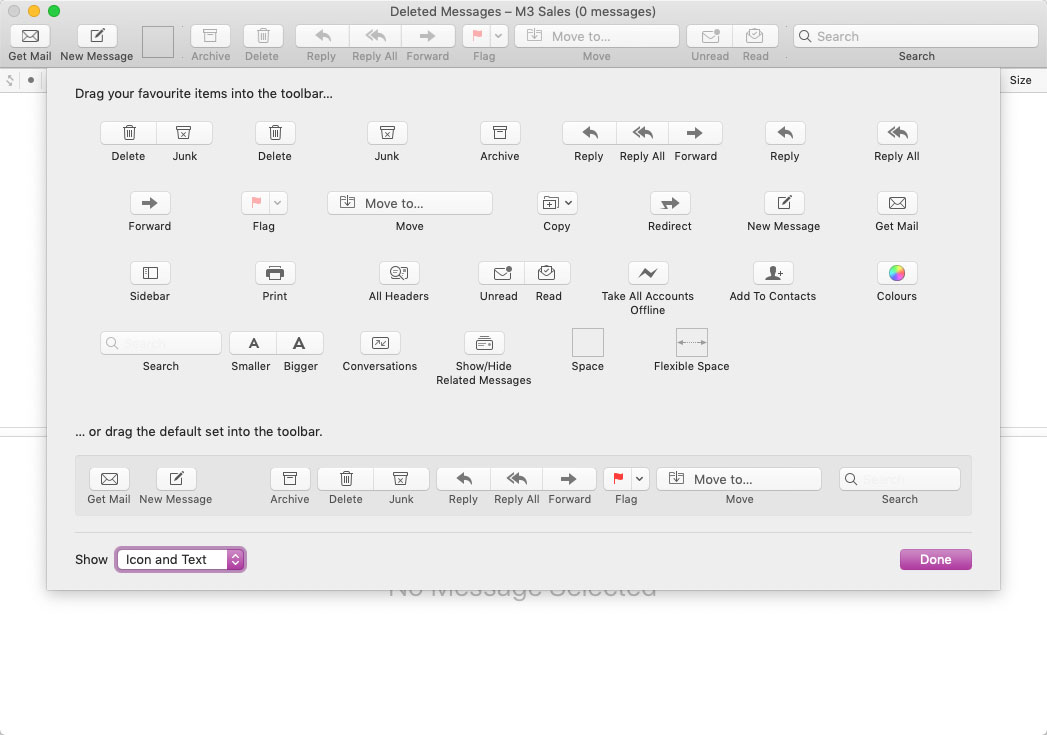
Toolbars are a familiar sight in iOS Apps, and act much in the same way as on the Mac, offering quick access to common actions and navigation. However, on the Mac users have a lot more control over them. Toolbars in AppKit can be configured to display text labels (and even to only show the text label), aiding in discoverability. Users can also be given the ability to customise the toolbar – adding, removing, or rearranging toolbar items as they see fit.
Menus and Status Bar Items
Ever since the original Mac over 35 years ago (and even the Apple Lisa that predated it), there has always been a menu bar at the top of a user's screen. This menu bar is usually split into two parts.
On the left is the menu bar for the selected application. This holds pretty much every action the user may wish to perform in the app, often with keyboard shortcuts to aid user productivity. The menu bar also aids in discoverability of the app. Users can click through menus to see what actions the app offers. And if they still can't find what they need, the help menu lets them search through the entire menu hierarchy.
On the right is the global part of the menu bar. This contains system functionality such as Notification Centre, Spotlight, and the date and time. However, it can also be used for Status Bar Items. These items can be clicked to display menus or completely custom UIs. These can allow your users to interact with your app even when the main app is closed. For some apps they even form the entire UI.
Windows, Panels, and Sheets
Windows are the basis of all apps on the Mac. Unlike UIWindow, which is a UIView subclass and something most people rarely need to think about, NSWindow is entirely separate from NSView. It is designed to handle the huge amount of functionality required on a multi-window system. Windows can be resized and zoomed, grown to fit the full screen or minimised to fit in the Dock. They can be hidden, closed, moved from screen to screen, and placed over one another. Windows can also have parent-child relationships, much like views.
Panels are a subset of windows, designed for secondary tasks. They are often used for things such as inspectors. The key difference is that a panel is automatically hidden when the user moves away from an app.
Finally, sheets are the main way to show modal UI in a Mac app. Modal windows can be a pain to use in a multi-window system, as you can lose track of the modal window and end up confused as to why you can't interact with the app's main window. Sheets solve this by tying these modal windows to a parent.
Colours and Fonts
Creating content often requires a lot of control over things such as fonts and colours. While AppKit and UIKit are similar in their support for fonts and colours behind the scenes, UIKit doesn't offer any way to let users select these, whereas AppKit provides NSColorPanel and NSFontPanel.
NSColorPanel provides a large variety of pickers, including a colour wheel, sliders (for RGB, CMYK, HSB, and Grayscale), colour palettes, image palettes, and even a pencil UI. Developers can also create their own pickers to augment these.
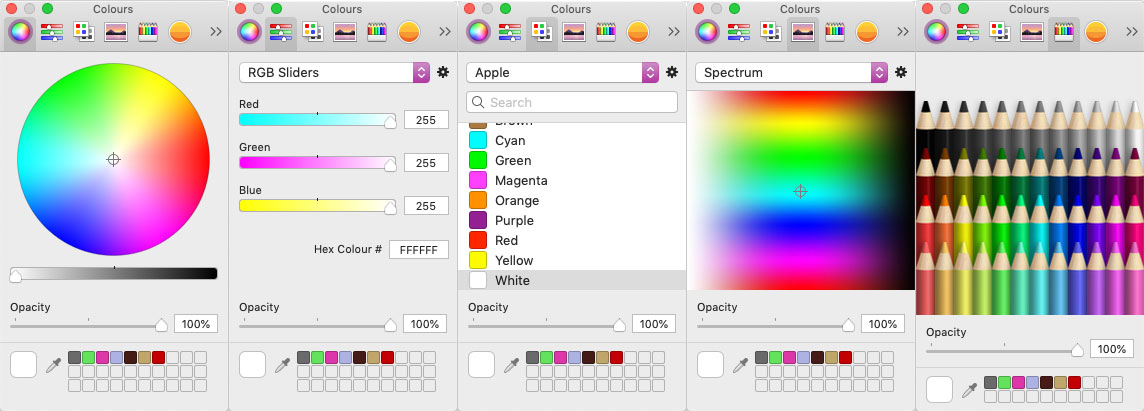
One of the advantages of a system provided colour picker is it can integrate well with the rest of the system. Any custom palettes you create, or any colours you save in the favourites bar at the bottom, will be available across every app that displays an NSColorPanel. This integration goes further with a pipette tool that lets you select a colour from anywhere on your screen.
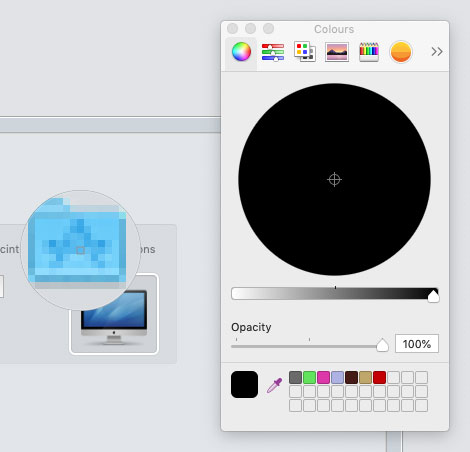
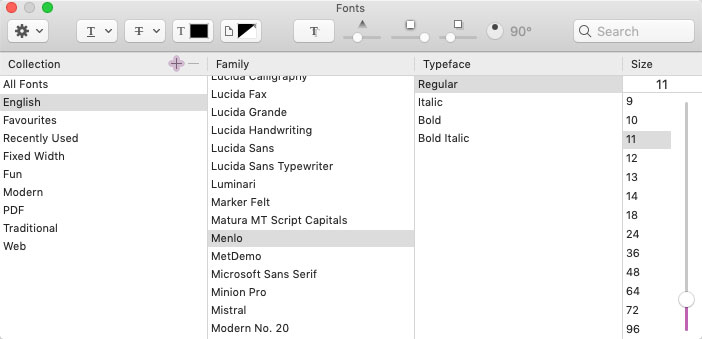
Meanwhile NSFontPanel provides users with full access to their entire font library. As well as the usual choices of picking a font family, weight, and size, the user has access to any font collections they have created. The panel also allows users to change the foreground and background colours, underlining, strikethroughs, and even text shadows.
Of course the real power of these two classes is you get all of this functionality with just a few lines of code (and in some cases, such as with NSTextView, you can get it for free).
Others
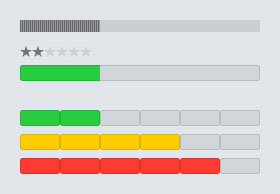
These are by no means the only additional controls available. There are many others such as NSPathControl (for display file paths), NSLevelIndicator (for displaying levels, ratings, or relevancy), NSImageWell and NSColorWell (for dropping and selecting colours), NSBrowser (for displaying multi column lists like Finder's column view), NSBox (for visually grouping controls) and most likely several more I have overlooked.
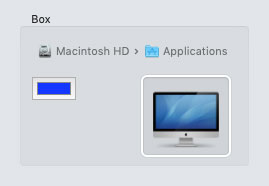
On the right: a box containing a path control, an image well, and a colour well
As you can see, AppKit has a large variety of controls, each with huge amounts of power. Many of these controls represent key functionality for making a Mac app feel like a Mac app, and providing access to them will be crucial to making Marzipan succeed. We are already seeing that some elements such as the menu bar and toolbars are already in Apple's initial pass at Marzipan, so hopefully we'll see some progress on other aspects. I'm also holding out hope that some of this functionality will make its way into UIKit proper, allowing the use of these powerful classes in the ever growing selection of pro iPad apps.
Be sure to check out part 2, which covers some of the less user-facing features.